Wednesday, January 27, 2010

Wait, I AM a Buff Bride!

When I updated our wedding website with our new engagement photos, I took a quick gander at the old ones, just for fun. I knew the new ones were going to blow the old ones out of the water, but I saw something that I hadn't expected: I lost weight! My workouts are working!

This is me in April of 2009.

Photo by FMIL Spaniel

Let's forget about the fact that I am makeup-less, hairstyle-less, and just style-less in general here, shall we? Let's also forget about the fact that the photo quality is the kind you can only get from a point-and-shoot camera and an inexperienced photographer. (Sorry, FMIL Spaniel! We love you anyway!) But seriously... what is with that BUMP?! Oh, it's my belly. :(

This is me in January of 2010.

Photo by Meg Perotti

I think the differences are pretty obvious, but I should also point out that my jeans are two sizes smaller in the second picture!

It might not seem particularly impressive—I lost two pant sizes in 8 months, but I'm guessing that most brides here don't have that long to go—but the truth is, I didn't really get serious until November of this year... maybe the tail-end of December, if I'm being honest. So I really lost two pant sizes in five weeks. And if I'd had more to lose, I bet it would have made a bigger impact!

I have been doing the Buff Brides 12-week program for nearly six weeks now, and I flesh it out by playing Ultimate Frisbee once a week (about an hour of intense cardiovascular exercise!) or by doing this video a couple times in a row after weight lifting. I don't skip workouts no matter how lazy I feel, and I watch what I eat (most of the time). Amazingly, it really hasn't been that hard. And now that I see my own before and after? I don't think I could let myself fall off the wagon again!

Have you been sticking to a workout plan? Have you started to see results?

Tuesday, January 26, 2010

Fly free, little invites!

I've shown you all the individual components of the invitations, but now that they're off in space (or in people's homes, since I've already received a few RSVPs!), I thought I would show you how they all came together and do a price breakdown.


This is what people will see first: my so-so handwriting with a simple roller pen, and standard USPS $0.44 wedding stamps. :)

I very, very briefly considered vintage and custom stamps, but the price was prohibitive and I just didn't care that much. I also considered purchasing a calligraphy pen to address the envelopes, but I figured that my mediocre handwriting would stand out less if I used a simpler pen. It's not perfect, but I'm not unhappy with how it came out.


After guests carefully open the envelope so as to preserve the liner (shh; don't tell me otherwise!), they'll get an awesome eyeful of some corner flourishes and... a belly band! What ever could the belly band be holding together?

Front

Back

And here are all of the pieces together.


Yeah, so speaking of USPS postage... can't they come up with something better—or at least more universal—than a polar bear?


And the stealthy back of the RSVP postcards. I remain more proud of this than any other DIY project I have undertaken, for some reason.

And now, I commence the freak-outs while I wait for the rest of the responses. OH MY GOD I'M ABOUT TO GET MARRIED! Ahem, as I was saying. Price breakdown.
  • Invitations, envelopes, and RSVP postcards: $439.73 after tax for 115 invitations. I placed a deposit on my letterpress invitations when Ajalon Invitations was having a special of 100 invites for $3.50 (the special prices have gone up since then, but they are still quite low for the quality).
  • Patterned paper for liners and belly bands: $40 at Envelopper Inc.. I found a coupon online for free shipping. This only bought enough paper for 100 invitations (2 packs of 25 8½ x 11" sheets); I didn't line the international ones.
  • Ivory card stock for additional insert: $6.11 at Staples for 125 sheets (I used the rest for the menus). Only 30 sheets were used on these inserts, so this item will overestimate invitation costs, but I won't prorate it since I used most of the rest on the menus.
  • Postage: $74.16. I came just under the 1 oz weight limit for $0.44 postage, and used $0.28 stamps for the postcards, times 100, plus two international invitations (the remainder of the international invitations were hand-delivered by Papa Spaniel in the fall).
That brings the total cost of invitations to $560, or $4.87 per invite. I think this is a really good price for letterpress invitations with so many extras! Not only that, but it keeps me well within my stationery budget.

But we all know that "stationery" consists of more than just the invitations—if I'm being honest, I should also include the STDs, thank you cards, and programs. The STDs were a little pricey compared to what I now know I could have bought them for (oops!) at $80, while my homemade thank you cards were a steal at $6.11 (more card stock) plus $4.99 for envelopes—I'll also assume 100 stamps at $0.44 (though it will probably be fewer). The programs were a bit pricier, as well: 50 sheets of 11 x 17" black card stock ran me $28.90 (shipping was, again, free from Envelopper Inc.), while I managed to get 500 sheets of ivory printer paper at Staples for another $6.11. The green ribbon was $6.99 per roll, times two rolls (I didn't end up needing the third, so I returned it), bringing the total program cost to $48.99.

(Things I did not include in final cost were adhesives for attaching the envelope liners [I already had them at home], hole punchers [which were only a dollar each and will outlast these projects], my rotary trimmer [because I also already had it], and printer ink [too hard to calculate per page costs!].)

All of this brings my stationery to a grand total of $744.09, plus or minus a few cents or dollars here or there for tax I may have forgotten to account for (I can't remember if I paid sales tax on the card stock or liner paper) or rounding I may have done in previous accounting. I have lots of leftover card stock that I will use for table numbers and place cards, and leftover paper and card stock that I will use for non-wedding projects, so I think that means that I came in... under budget! It's a feat of which I am especially proud, since I budgeted for 100 invitations and ended up needing 115, and I didn't necessarily think in advance of all the other paper items I would need. :) Hooray!

Did you do a cost-breakdown of any of your projects? Were they where you expected them to be?

Monday, January 25, 2010

We! Have!! E-Pics!!!

1

Oh, sorry, I meant to blog something first. I got excited. :-D

As you've heard by now, Southern California got pummeled with rain last week—enough that I was worried our weekend engagement shoot would have to be canceled. But the sun came back out Saturday, the puddles miraculously dried, and Mr. Spaniel and I got to have our "fifteen minutes" with our photographer, who was a total blast to work with!

2

You may have noticed that neither the sweater nor the tunic made an appearance in our shoot—the night before, I pulled out everything in my closet and hated all of it (isn't it frustrating when that happens?). Suddenly the tunic made me look pregnant; the sweater, fat; the flats, short; the jeans, dated. Poor Mr. Spaniel; he was on the receiving end of some ridiculous theatrics.

Miss Spaniel: I don't have anything to wear.
Mr. Spaniel: How about that black dress?
Miss S: No, that's too dark.
Mr. S: Are you sure? I really like it on you.
Miss S: WHY DON'T YOU SUPPORT ME? NOTHING I DO IS EVER GOOD ENOUGH!

...and so on. So I put on the only jeans that made me feel good, and indulged in some early morning shopping after getting my hair done.

3


We ended up taking pictures in Old Town Pasadena, where we spend most of our date nights! Not only did we find the most awesome backdrops (that last picture? Taken in front of a dumpster. Seriously), but I'm really excited that, some day, our kids will see these pictures and they'll really see not only that we are both "really, really, ridiculously good looking" (HA!) but they'll also get a really clear snapshot (no pun intended) of where we were at that time in our lives. The shoot really reflected us.

4

I'm pleased as pie with these pictures, and I'm so glad we got this experience in front of the camera, and with our photographer, specifically. It went from feeling silly and embarrassing to silly and lots of fun!

5

We'd really love to get prints of a few of these, to put up in our apartment (finally, pictures where we don't both look really, really ridiculously stupid!), and to frame and give to our parents. It's so hard to pick our favorites! I can hardly even narrow it down for this post!

6

So, once again, I seek the wisdom of the 'hive: which shot do you like best?

Poll Option A: 1
Poll Option B: 2
Poll Option C: 3
Poll Option D: 4
Poll Option E: 5
Poll Option F: 6

All photos in this post by the really, really ridiculously talented Meg Perotti.

Thursday, January 21, 2010

Invitations mailed. Existential crisis, commence.

It was an exciting day in the Spaniel household when we finally got our wedding invitations in the mail! I didn't take any pictures—our focus was on staying dry during the latest torrential downpour—but oh, the relief! I carried them all in a plastic bag inside a plastic tub to keep them dry on the way to the post office, and only managed to drop one into a big dirty puddle on the sidewalk. :( Luckily, that invite was headed to New Zealand, so I can blame the vagaries of international mail delivery for that one, and no one will be the wiser!

In addition to excitement, though, I feel a little bit of... alarm? Like this is a wake up call of sorts. We've been engaged for so long that the wedding has never stopped feeling far off in the future. But it's not so far away, anymore! Catering headcounts are due soon! Fire permits for the candle centerpieces need to be obtained! I no longer have forever to figure out what we're going to do about our guest book! We actually need to start planning our honeymoon itinerary! And on top of that, I still have work to do, classes to study for and jobs to find!

But it's not just the time crunch we're facing that has me feeling a bit overwhelmed. See, I didn't realize this at first, but sometime after the invitations actually arrived from the printers it dawned on me that there was a major part of me that simply never expected to be a married woman, and I feel surprised and amazed and somewhat confused with each step closer that we take towards making me one. Seeing our names there, and now inviting people to witness this event, is forcing me to really confront this version of self I'd previously constructed: the independent, career-minded woman who never particularly wanted children and hasn't belonged to any pro-marriage religious tradition in fifteen years, in contrast to this woman who suddenly just can't wait! to get married and start a family. Forgive my lack of eloquence, but it's just... weird.

Making the decision to get married is difficult to intellectualize. After all, I've been committed to Mr. Spaniel for years now: we're both in it for the long haul and that would be true with or without the legal component. If we were just concerned about our property rights, we could have written contracts to resolve it. Court orders would change our names just as thoroughly as a marriage license. It all begs the question: what is the point of even getting married at all?

I've been struggling with this question for awhile now, and I still can't answer it in a brief statement. As flawed as marriage is, there is something special—and privileged—about the institution. It's a simple legality that expresses to the world what Mr. Spaniel and I have already expressed to each other, and that has value. I don't just want the rights and obligations of marriage (although I want those, too); I want the recognition from society that being husband and wife—and not just lovers and partners—gives us.

My intent right now isn't to share my politics, just my personal struggle. I find it entirely baffling, though, that in 9/10 of states, we don't allow so many people to struggle with the same thoughts.

You ask, I deliver

It's amazing being able to plan a wedding in the age of the Internet—get stuck on wording? Hop on-line! I can't even say how much text I "borrowed" from other brides out in space for our ceremony programs, but I'd probably still be thinking about what to write instead of wondering where to store them all right now if there hadn't been so many samples online to rely on.

In that vein, here's what we included in our programs, in case it helps anyone!

Cover page
You've seen this one before!


I just used this page for the Who/Where/When. I got the idea in my head that this would be a great page for a cute photograph and vellum overlay (à la Mrs. Emerald and Mrs. Eggplant), but I wasn't willing to invest more money or time. Maybe one of you will try these programs that way? :)

Wedding Party
This one is more or less self-explanatory: I listed everyone who would be preceding us down the aisle, as well as their relationships to us.

It was also an excellent excuse for some cheesy quotations:

Now join your hands, and with your hands your hearts. - William Shakespeare

I get by with a little help from my friends. - The Beatles

Ceremony
This is probably the one where I borrowed most heavily from other brides, many of them Weddingbee bloggers!

Sorry, ladies; I didn't credit you on the programs!

Love is a friendship set to music.
- E. Joseph Cossman

Friends and family, thank you for joining us on our wedding day. We will be standing today under a chuppah to create an intimate space, symbolizing the home that we will share together. The sides are left open to signify that all friends and family are welcome into our new life and home.

PRELUDE...Magnetic Fields, The Book of Love

PROCESSIONAL
Wedding Party’s Entrance...Pachelbel, Canon in D
Procession of the Bride...U2, All I Want Is You

WELCOME AND INTRODUCTION
The ceremony will be led by Mr. Fred.

READING
From “The Prophet” by Khalil Gibran.

MARRIAGE CONTRACT (KETUBAH)
The ketubah, which is signed before the wedding ceremony, is a marriage contract with a two-thousand year history. Traditional ketubot outline the groom’s responsibilities to his wife and are legally binding agreements. Our ketubah is a “contract of the heart,” documenting our promises to each other, and will serve as a reminder of our love and commitment to one another. It serves not only as a contractual document but also as a work of art to be displayed as a daily reminder of the promises made.

MARRIAGE RITES
Exchange of Vows and Rings
Presentation of Dr. and Mrs. Daniel Spaniel

BREAKING THE GLASS
At the end of the ceremony, Mr. Spaniel will shatter a glass under his foot. Just as a broken glass cannot be mended, likewise the promises made today are irrevocable. “As this glass shatters, so may our marriage never break.”

RECESSIONAL...The Zombies, This Will Be Our Year

I had also hoped to explain the henna ritual for Mr. Spaniel's side of the family here, but we ran out of space and I didn't think it was essential to the ceremony. Hopefully his parents will clue them in!

Acknowledgments
I also did a lot of "borrowing" for the "Remembrance" text. Mr. Spaniel and I were each very close to some of the people who we listed here, and didn't know others all that well (most of our grandparents passed while we were quite young, on the one hand, but I was very close with my cousin growing up [she was around my age], as well as my aunt). It was easier for me to deal with to keep the wording somewhat generic.

REMEMBRANCE (AZKARAH)
On this most special milestone in our lives, we wish to lovingly remember those close to our hearts who are no longer with us. Today we remember:

...

Although they cannot be here, we keep them in our hearts on this day.
___

Dear Family and Friends,

On this day we thank our parents, our families, and our friends for your love, support and encouragement. We have been blessed by your gracious love, support and friendship over the years, and look forward to its presence in the years ahead. We would also like to express our gratitude to those who have freely given of their ideas, support and labor to make this day possible.

Thanks also to each of you who have traveled the distance, near and far, to witness our vows to each other and to join us in our marriage celebration today.

All our love,
Miss & Mr. Spaniel

Now go forth and make programs!

Wednesday, January 20, 2010

À la carte (or, the map!)

As you may know by now, I don't like to follow tutorials—they save time and lead to correct results the first time, which certainly won't do for me! So rather than follow Mrs. Hibiscus' or Mrs. Spring Roll's tutorials (neither of which I thought to look at until after I finished my map/started writing this post—although my process was pretty similar to Spring Roll's except for the fact that her's looks better than mine), I determined that my minimal design skills would carry me through this DIY. I was right!

First, I went to Google Maps and searched for driving directions from the hotel I blocked rooms in to our venue (the two locations I wanted to mark on the map), then messed with the zoom and positioning until I could see the major freeways that almost any of our guests would need to take. Then I took a screen shot and pasted it into a new image in Photoshop.


Then I cropped to where I really wanted the map to cover, created a new layer to trace the major freeways and streets in varying pixel weights, and added some blue for the Pacific Ocean to ensure that no one drove into it, because I'm helpful like that.


Next I added freeway markers, city and street names, and a compass (solely because I'd just gone on a font downloading binge at Dafont.com and picked up a nifty compass dingbat font a few days earlier!).


The hardest part (for me) was deciding how to mark the venue and hotel, because I didn't have and couldn't find any dingbat that I particularly liked that was simple enough to still be seen on the scale of the map—they were too complicated and not really discernible in small sizes on such a large map. I just ended up using the star-shaped brushes that came pre-loaded into Photoshop.


Voilà! La carte!... er, see there! The map! Despite reinventing the wheel (and changing my compass mid-post, didja notice?), this still only took under thirty minutes, so I think it was a worthwhile project. I only plan to post the map to our wedding website (rather than printing it out to send with invitations), so that did make it a little easier to commit to, though. :)

Did you give your guests a map, or let them fend for themselves?

Two months before (by January 20)

  • Discuss locations and shots with photographer
    We'll probably do this at our engagement shoot?
  • Review playlist with the band or the deejay
    Sure, once we decide on what we want?
  • Send invitations
    Heading to the post office today!
  • Touch base with vendors
    Huh?
  • Submit a newspaper wedding announcement
    I guess that would be a good idea?
  • Enjoy bachelorette party
    Really?? Who does this two months before the wedding??
So, um... we are officially behind. :)

Tuesday, January 19, 2010

Singing in the rain

I don't know if you've heard, but we Angelenos are facing some uncharacteristically inclement weather this week. Luckily, I am prepared!


In 2009, I think we totaled about three days of rain (two of which you could probably characterize as a drizzle), but I went ahead and ordered some rain boots on Zappos in the spring anyway since my campus practically flooded from it and ruined my favorite ballet flats. (By the way, I am still in mourning and trying to determine whether there is a cause of action against the designer of the parking structure for negligent infliction of emotional distress... no?). So as I stomped and sloshed my way around school today in my spiffy new(ish) rain boots (with dry jean hems, hooray!), I suddenly made the connection:

(source)

Rain boots? Wedding dress? Incredibly cute picture? Yes, yes, and yes! Well, maybe, yes, and hopefully, but you get the idea.

I'm hoping the weather will be dry and not too cold, either on W-Day, and if that's the case I won't even bother bringing the boots along. But if there is even a hint of mud anywhere, I will not be slipping and sliding in my strappy gold sandals—I'll be happily joining the ranks of rain booted brides instead!

(source)

(source)

(source)

Did you include anything unexpected in your bridal wardrobe? Do tell!

Please don't stop the music (until we all get down the aisle)

Mr. Spaniel and I love music, and there was all kinds of great stuff we'd planned to incorporate into our ceremony. But it only took a few revisions of our monster programs to realize that our musical selections would overtake our actual ceremony in duration if we didn't make some cuts! As a result, we've dropped from six much-loved and deeply-considered pieces to three.

The wedding party's processional will all be to the ever-popular Pachelbel's Canon in D. I know this is a super, super common selection, but there's a reason for that: it's so beautiful! True story: I was not the kind of girl who dreamed of my perfect wedding from a young age—I've made up everything as we've gone along, pretty much—but I knew from the first time I heard this piece at a dance recital when I was four-years-old that this song would be in my wedding. Luckily, Mr. Spaniel likes it, too, since we've decided the bridesmaids and groomsmen will walk down together (I'd initially thought they'd walk down with him before the rest of the processional), so it stays!

We've chosen slightly less traditional music for my processional and the recessional. And so, without further ado...

Bridal Processional: Vitamin String Quartet's cover of U2's All I Want Is You

I've always thought this was a beautiful love song.

Recessional: The Zombies' This Will Be Our Year

Cuter than the band's name would lead you to believe, right? I tend to think of this song as a New Year's song, but I think it works for the recessional just as well!

Where did you find your wedding music?

Wednesday, January 13, 2010

Programs! Get yer programs!

I have learned an important lesson in tackling all the DIY projects that I did in the past few weeks: DIY is not easy for large weddings. "Large" is a relative term, I understand, but I'm going to go out on a limb here and say that when your invite list approaches 200, it doesn't take too many projects before you're entering a world of pain, son.* I'm glad I did it—I love the way our invites look, and I'm glad people will be able to follow the ceremony better—but WOW was that more work than I thought it would be! (But notice, not so much that I stopped, or that I didn't still have time to tell you about it! :)

So. The last thing project I tackled this winter break was programs, with the help of Spaniel BM-Noe (the very same wonderful lady who helped me with the envelope liners... I should have added a special line in the acknowledgments thanking her specifically for helping me to assemble these beasts).


Before I start 'splaining to you how to make these monsters programs yourselves, here is where I got the tutorial and templates. Below are the things I learned and tweaks I made to make the project go a little more smoothly.

Step 1. Download your Word templates. The problems I ran into here were that the template image didn't align itself to the edges of the page, and I had to mess around a lot with the alignment. In the end, it didn't work: I couldn't cut perfectly on the line, so you could see them in every program, and one of the pages seemed to print with the template image off-set by about 1/4" despite all of my fussing with it, so I ended up deleting the guides. It made cutting later a little harder, but here's my trick:
  • Set up a Word document with margins 1/2" all the way around.
  • Format the document for two columns with 1" space in between them.
  • Set the header (footer? the CAPS DESCRIPTION) of each page as follows: page 1 ends at 9", page 2 at 9.5", page 3 at 10", and page 4 at 10.5". You could make a fifth page that ends at the bottom, if your printer can print that close to the edge of the page OR if you get legal size paper (8.5" x 14").
Enter your text (I'll share mine in a future post if there is interest) and copy it into the second column on each page.

Step 2. Print your program pages. I used colored (ivory) printer paper, 20-lb weight (you can use card stock, but it will be harder to punch through later!).

Step 3. Cut cut cut! This was one of the more boring parts of the project, so BM-Noe and I watched a movie while doing it.* A rotary trimmer and a lever paper cutter (borrowed from FMIL Spaniel) made this job a lot faster!

Step 4. Prepare backing papers. I used black card stock (11" x 17" from Envelopper Inc., so I couldn't print the template directly onto them. My hack was a little complicated, so here's what I did.
  • Print a full size larger background layer template (4.75" x 11") onto white printer paper and cut the top half out. I actually needed a 12" long back—you will have to fold the top of it over the text pages—so I just used the top of the template for the holes and didn't need the full length (I used a ruler for the rest of it!).
  • Measure and cut backings.
Okay, maybe that wasn't that complicated. It took me awhile to figure out, though!

Next, we marked and folded the top of the backing papers, wrapped the printer paper background template around the top, and punched holes. I bought two hole punchers so we could work on it simultaneously, which was good because if one person had to punch that many holes through thick card stock, they would start to have a very, very bad day. (If you plan to do this yourself, be prepared to take lots of breaks. My hands hurt for two days afterward, even with help.)

Step 5. Punch holes in text paper. We tried to punch all of the holes at once (the card stock and the paper), but it was just too thick. Since we didn't print the template on the text paper (see problems with Step 1!), we just held each set of four pages against the background where we would want them, and used the background as a template for where to place the holes.

Step 5. Set eyelets. I really wanted to do this because I think it looks more finished (and even invested in a Crop-A-Dile eyelet punch
for the task!), but I had bought 1/8" eyelets and they were too small to hold all of the papers together. Boo! We tried to pick up some larger ones at Michael's, but they actually didn't have enough of the size I needed so we skipped it. The message here is that if you want to use eyelets, get eyelets that are bigger than 1/8" and have them in sufficient quantities before getting your friend over to help you!

Step 6. Cut and tie ribbon. I wasn't really sure how much ribbon each program would need (I'd estimated 12" each and bought an extra roll just in case), but after some trial and error we realized each one needed 16"! And that's for really small bows! Thank goodness for the extra roll!

(Don't make the programs angry... they outnumber us!)

Step 7. Store the programs. I'm kind of still working on this one. :) So far I've left them stacked on top of each other with the ribbons, but they curl that way, and I don't think that will look so nice as people grab them on the wedding day. So I've been looking for a big scrapbooking box or two where I can lay them all flat for the next couple of months, but no luck yet.

I think the programs are going to be helpful in explaining our multicultural ceremony so that no one feels lost, but I can also understand why people skip them! Are you making programs for your ceremony? Why did you decide to (or not to)?

*Can you tell which movie? ;)

Tuesday, January 12, 2010

Dress me!

'Hive, this Bee needs your help. My engagement photo shoot is coming up soon—yes, I know I've been engaged for well over a year already, but I'm still engaged! And that means pictures must be taken!—and us Spaniels just do not know what to wear!

First, some background: Mr. Spaniel and I have chosen a setting that we're really excited about, though we had to pass on a lot of other awesome nearby locations. Goodbye, Downtown Los Angeles!

(source)

(source)

Farewell, light rail and Union Stations!

(source)

I hardly knew you, Descanso and Huntington Gardens!

(source)

We're keeping the actual location a secret for now (I'm! So! Mean!), but it's probably closest in style to Downtown LA... and I'm struggling with my outfit!

I know that I want to wear something where I feel like myself... and said self is not a dress or a skirt girl. In fact, self is a blue jeans kind of lady, which leaves me basing my outfit choices around my favorite pair.

(source)


I'd pair these either with a tunic and some cute flats,

Mine is similar to this, but in a jewel-tone green (source)


I actually also got these shoes for free with my BlueFly gift card! (source)


or a sweater and some slouch boots.

(source)

(source)


Since we don't have all that much time and I am not sure it will add much, really, there won't be any outfit changes. Which way would you go? And if you had an e-shoot, how did you choose your own e-shoot outfits?

Monday, January 11, 2010

You mean just PICKING the menu isn't enough?

As you already know, Mr. Spaniel and I are pretty jazzed about our wedding menu. Unfortunately, we couldn't fit full descriptions of every entreé on the RSVP card (they're described in more detail on our wedding website, but I have little faith that many people will make it there), and we'd like to minimize people's culinary surprise. Or something.

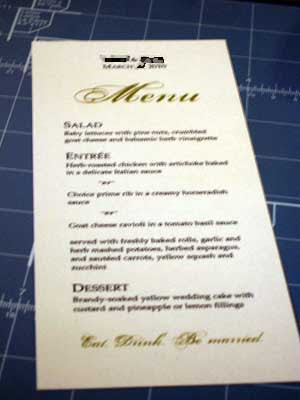
Enter the wedding menu card! (Cue music. Or the sound of chewing. Don't eat the menu card, please; it's not edible.)

(Photograph by Rick Aguilar, via SMP)

(source)

The menu card can be a fun way to spice up the table decor, and since our linens are pretty bland and the task looked pretty easy, I went ahead and threw some of these together. Here's how!

Step 1: Open a Word document. Set the page up with a landscape orientation and 1/2" margins all the way around.

Step 2: Set up three columns with a 1" gap between them (each column will be 2.67").

Step 3: Type away!

I steered slightly away from the fonts I used in my invitation suite: I kept the Palatino Linotype block font, but instead of Shelley Allegro/Sheer Elegance I switched to Porcelain (a fussier font, I think, but more visually interesting). Since I was using Mr. Spaniel's photo printer instead of my usual laser (which has a nasty habit of bending my card stock into curls, as I discovered while printing our thank you cards), I decided to also play with a little bit of color. A very little bit of color:


I first saw "Eat. Drink. Be married." in Mrs. Peep Toe's recaps and thought it was pretty cute... now I get to use it!

Step 4: Print on card stock. I used ivory colored card stock from Staples, and the shade of green came out absolutely perfectly on it... it matches the ribbon I'm using for our programs! (What programs, you ask? Patience, grasshoppers.)

Step 5: Cut your card stock into thirds. This can be tricky if uniformity is important to you, but I just pulled out a ruler and marked off three and (a little tiny bit past) 10/16" and cut. My rotary trimmer is my lifesaver.

Step 6: Fin! There is no step 6! Unless folding them into napkins is your step 6.

(I swear the menus are not as blurry as my photograph)

Speaking of which, that's what we'll be doing with these: setting one inside of the napkin at each place setting. And I am very, very happy that someone else will be doing that job. :)

Did you find yourself adding DIY projects to your list in the last few months leading up to the wedding?

Thursday, January 7, 2010

But baby, it's cold outside

I'm a weather wimp. To be fair, it's not really my fault! I grew up in Southern California, where we don't really have weather—50° F is pretty much freezing in my book.

(A funny story: I visited a law school in NYC during the spring one year, and it was 60° out that day. People all over the campus were out in their shorts, t-shirts and flip-flops; I wore a turtleneck sweater, my big wool peacoat and Uggs. I don't know what I would have done if I'd had to face actual winter weather when I was still cold in my warmest clothing! I guess that—and Mr. Spaniel!—is why I'm still in L.A.! ;) ).

Luckily—since our ceremony will be outdoors—March weather in Malibu should be fairly mild (unless it rains—a bridge we will cross in another post!). Here's what I'm looking at:

(source)
Even though the weather should be mild, I am definitely looking at ways to keep warm for our evening ceremony.

Conveniently, my dress has a matching 3/4-length sleeve bolero, which is available for an additional $100.

(source)

Inconveniently, I did not order it with my dress, so I'm not sure if I can order it separately (or get it in time if I do). Why didn't I order it? Because it's the only bolero I ever met that I didn't like the look of!

So as it turns out, finding a bolero that is not hundreds of dollars and one that actually provides warmth (rather than just modesty, which I'm not really that worried about) and that ALSO matches my dress is kind of impossible (unless one of you knows about something that I don't? Hm?). So I'm looking into a pashmina or shawl instead.

(source)

I think this idea has more promise, but I haven't found anything that has bowled me over yet.

What did/will you do to keep warm at your evening wedding? Or were you lucky enough not to have to worry about it? :)

Wednesday, January 6, 2010

Hidden messages

Sometimes, I get surprised by how little people know about weddings who aren't actually planning one. I was shocked to learn that some people don't realize that you should generally avoid wearing a long white gown to a wedding if you're not the bride, that not everyone understands that you probably shouldn't bring an uninvited date without permission, or that some people don't know how to fill out a response card that comes with a wedding invitation!

I suppose some response cards are less than 100% self-explanatory, and our RSVP postcards are not really any exception: they are laid out like this.


We hope that by asking people to initial their entreé selections, we'll know how many in a family are attending, but in hindsight we probably should have replaced the "__ ACCEPTS" with "__ of __ ACCEPTS" so that they'd know to indicate a number (and also what the maximum number ought to be!). But we just couldn't figure out a way to make it painfully clear that the "M_________" line needs to be filled in with a name! I thought everyone knew this, but as we've shown some of our friends the invitation suites, they had no idea... so I'm glad I checked!

To combat the possibility of having to sort through 115 sets of names to determine by process of elimination who a particular RSVP card may have come from, I did what many brides wisely do: I put numbers on each of them, corresponding to their position on a spreadsheet I've been managing since we started making our guest list. There are lots of ways to hide these numbers—one of the coolest I've seen was Mrs. Green Tea's MOH's black light pen method—but I already knew I wanted to add more visual interest to the back of the postcards so I decided to design a monogram where I could tuck the number in a non-obtrusive kind of way. Here is the monogram I came up with...


And here's what it looks like "in action"!


It was a simple little add (even though I had to actually manually change the number 115 times and hand-feed each postcard through the photo printer!) but I am super glad I did this: unlike the envelope liners, I have no post-DIY regrets and I really love the way they came out.

How did you track your RSVPs?

LinkWithin

Related Posts Widget for Blogs by LinkWithin